newclassic
New member
- Feb 17, 2013
- 37
- 0
- Parrots
- 1 lovebird (April 1997), 1 cockatiel (adopted in '97 at ~2 yrs)
DIY Tutorial: "Happy Hut" sleeping tent (pic heavy!)
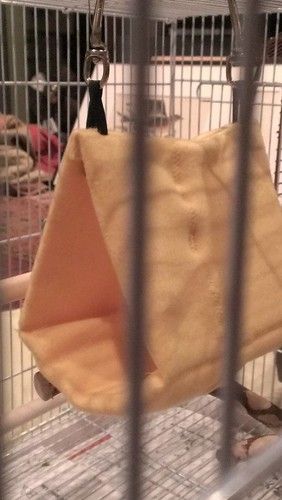
My lovebird loves her happy hut, which is on its last limbs. Since the shop that sells them is an hour away, I figured I would just DIY one instead of waiting for shipping with an online order.
WHAT YOU'LL NEED:
DIRECTIONS: EASY WAY
*with this easy way, you'll need to use plastic instead of paper, otherwise it won't be machine-washable. You're sewing the insert permanently inside the hut*
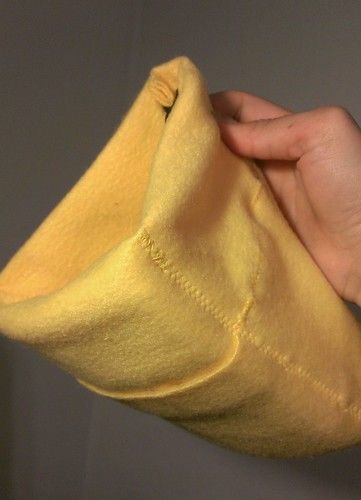
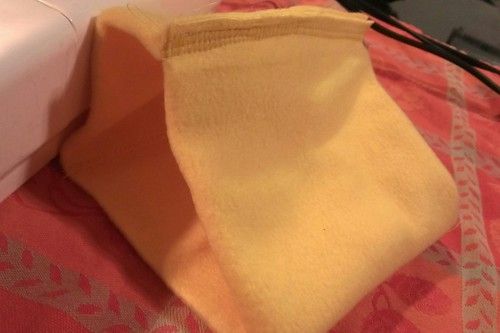
1. Measure the fabric according to your parrot's size. Remember, a happy hut is basically a triangle made out of a fabric tube; it'll eventually look something like this:

2. Fold fabric in half lengthwise, outside-in.

3. Sew a seam lengthwise down the long side of the fabric--you'll end up with a long loop. Flip inside out, so the seam isn't exposed.

4. Cut plastic to fit inside; it should be almost as wide as the tube, but no longer than ~1/3 its length.
(you could cut up a plastic folder or something; either way, it should be as sturdy as cardstock in order to support the shape)
5. Slip the plastic into the center of the tube. Sew either end shut.

6. Sew both ends of the tube together. Make sure what you want on the INSIDE is on the OUTSIDE while you sew. Once you sew the seam, flip right side out.

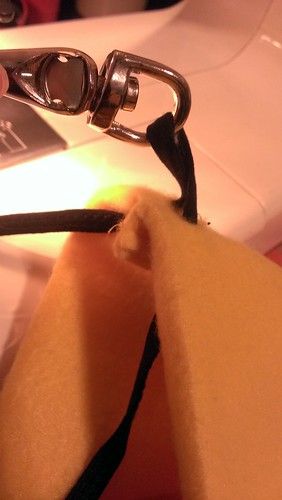
7. Cut holes, feed string through, and tie directly to cage; or, attach carabiner. Voila, you're all done!
- - - - - - - - - - - - - - - - - - - - - - - - - - - - - - - - - - - - -
DIRECTIONS: HARDER WAY
*with this method, you're going to overlap fabric to make the insert removable for washing. this way, you can use cardstock instead of plastic*
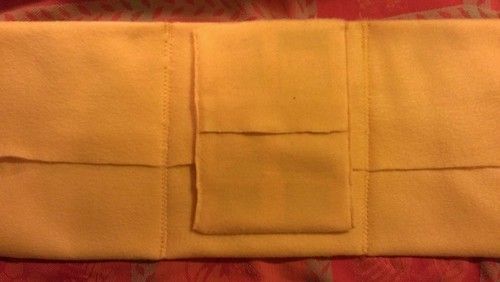
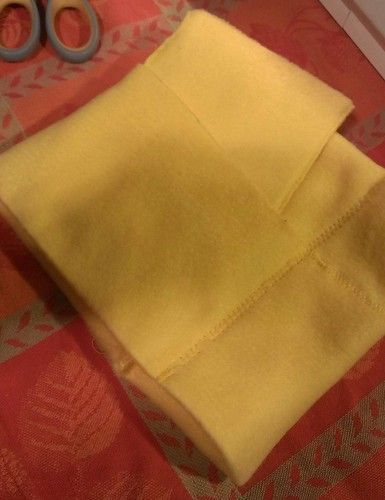
^ the bottom has overlapping fabric, which means the cardstock is removable.
1. Measure the fabric according to your parrot's size. Make it a little bit wider, to account for overlap.
2. Fold lengthwise, but OVERLAP the fabric to create an envelope in the center; this makes the insert removable. Instead of sewing a long stitch lengthwise, sew either end of the insert to form a mini pillow case. For everything, I used a straight stitched reinforced with a zig-zag stitch.
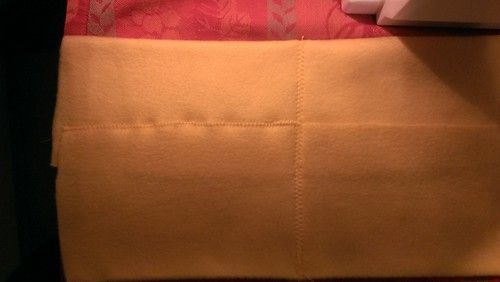
^ I kind-of went overboard and created a pillowcase for the insert itself, just to make it more padded.
3.In the above photo, notice how either end is also left open; you want to run a zig-zag stitch across to close it up.
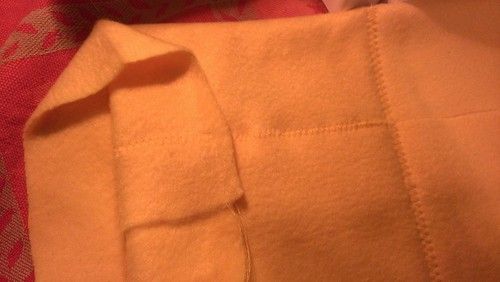
As in the pic below, I only sewed the inside and left the outside seamless. Just a matter of personal choice--you could sew through both sides if you wanted.
4. Fold in half, and flip it so the INSIDE is on the OUTSIDE. Sew the two ends together to form a triangle.
I found it helpful to flatten the ends of the fabric with a hot iron, just so it was easier to sew through 4 layers of fleece.
My lovebird loves her happy hut, which is on its last limbs. Since the shop that sells them is an hour away, I figured I would just DIY one instead of waiting for shipping with an online order.
WHAT YOU'LL NEED:
- Sewing Machine, thread, etc (nothing fancy, I bought mine off craigslist for like $30 a while back)
- Fabric (anti-pill fleece, faux fur, etc; something soft and warm, that won't stretch out of shape. I snagged 1.5 yards of fleece at the scraps shelf at Jo-Ann's, for like $3).
- String (e.g. shoestring, just something to help hold it up)
- Stiff plastic/cardstock/cardboard/etc. (to provide sturdiness, help create the triangle shape, etc)
- *2 Carabiners (to attach to cage; optional, if you just want to use the string)
- *Iron (to help flatten the fabric where you need to sew, it just makes life easier. Just don't iron over all the fabric or else it'll loose its fluffiness)
DIRECTIONS: EASY WAY
*with this easy way, you'll need to use plastic instead of paper, otherwise it won't be machine-washable. You're sewing the insert permanently inside the hut*
1. Measure the fabric according to your parrot's size. Remember, a happy hut is basically a triangle made out of a fabric tube; it'll eventually look something like this:
2. Fold fabric in half lengthwise, outside-in.
3. Sew a seam lengthwise down the long side of the fabric--you'll end up with a long loop. Flip inside out, so the seam isn't exposed.
4. Cut plastic to fit inside; it should be almost as wide as the tube, but no longer than ~1/3 its length.
(you could cut up a plastic folder or something; either way, it should be as sturdy as cardstock in order to support the shape)
5. Slip the plastic into the center of the tube. Sew either end shut.
6. Sew both ends of the tube together. Make sure what you want on the INSIDE is on the OUTSIDE while you sew. Once you sew the seam, flip right side out.
7. Cut holes, feed string through, and tie directly to cage; or, attach carabiner. Voila, you're all done!
- - - - - - - - - - - - - - - - - - - - - - - - - - - - - - - - - - - - -
DIRECTIONS: HARDER WAY
*with this method, you're going to overlap fabric to make the insert removable for washing. this way, you can use cardstock instead of plastic*
^ the bottom has overlapping fabric, which means the cardstock is removable.
1. Measure the fabric according to your parrot's size. Make it a little bit wider, to account for overlap.
2. Fold lengthwise, but OVERLAP the fabric to create an envelope in the center; this makes the insert removable. Instead of sewing a long stitch lengthwise, sew either end of the insert to form a mini pillow case. For everything, I used a straight stitched reinforced with a zig-zag stitch.
^ I kind-of went overboard and created a pillowcase for the insert itself, just to make it more padded.
3.In the above photo, notice how either end is also left open; you want to run a zig-zag stitch across to close it up.
As in the pic below, I only sewed the inside and left the outside seamless. Just a matter of personal choice--you could sew through both sides if you wanted.
4. Fold in half, and flip it so the INSIDE is on the OUTSIDE. Sew the two ends together to form a triangle.
I found it helpful to flatten the ends of the fabric with a hot iron, just so it was easier to sew through 4 layers of fleece.
Last edited:
")