Hi guys,
Since I'm fairly new to the parrot world and don't always have advice coming from years of experience, I'm excited to contribute how I made Uglow's play tree.
First off you'll need some tools.
-Drill
-Hand Saw (preferably a reciprocating saw for ease)
-Miter Saw or Circular Saw
-Table Saw "optional" you can the store cut the size you need
-Rotary tool - with sanding and grinding attachment
-Gardening Shears
-Tape Measure
-Goggles and Dust Mask
Hardware
-1 inch Stainless Steel Wood Screws (NOT Zink or Galvanized)
-2 inch Stainless Steel Wood Screws
-3 - 3.5 inch Stainless Steel Wood Screws "large gauge"
-1 heavy duty Hanger Bolt with matching Washer and Nut.
Lumber (this all depends on the specs you set for yourself, heat treated pine with NO SAP pockets and Poplar are bird safe but please do your own research)
-Plywood (for base)
-1x4 or 1x3 (quantity and length depending on size of base)
-2x4 or 2x3 (stabilizer. depending on how heavy duty your tree is)
-2x2 or 4x4 (tree trunk. depending on how heavy duty your tree is)
Other Materials
-Sealer (I used waterbased polyacrylic- for speed and less fumes)
*you'll need a sealer in most cases because some plywood has
formaldehyde in it and will emit fumes.
-Casters (optional but helpful)
-Wood glue
-Rope (optional)
-Eye Screws Stainless Steel
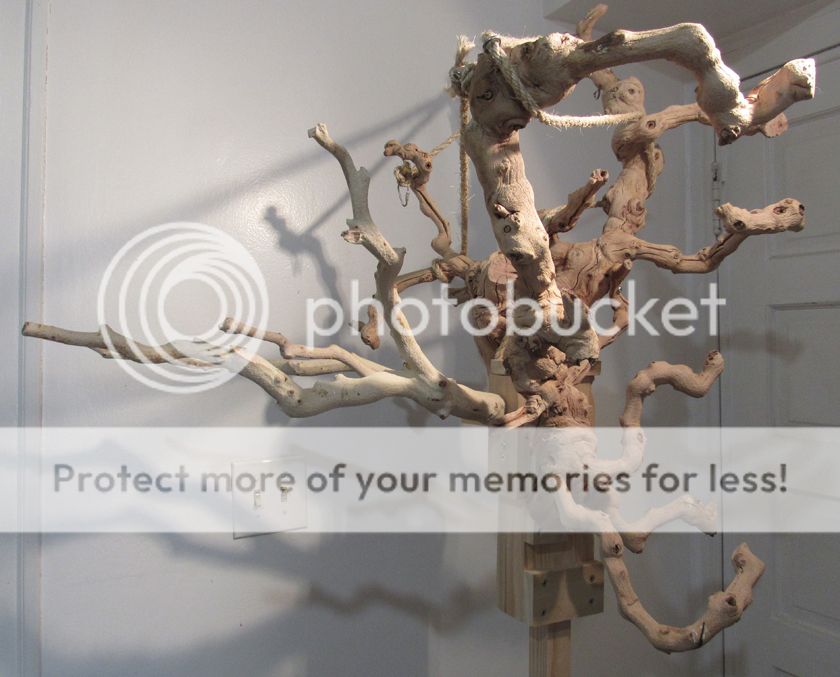
Branches
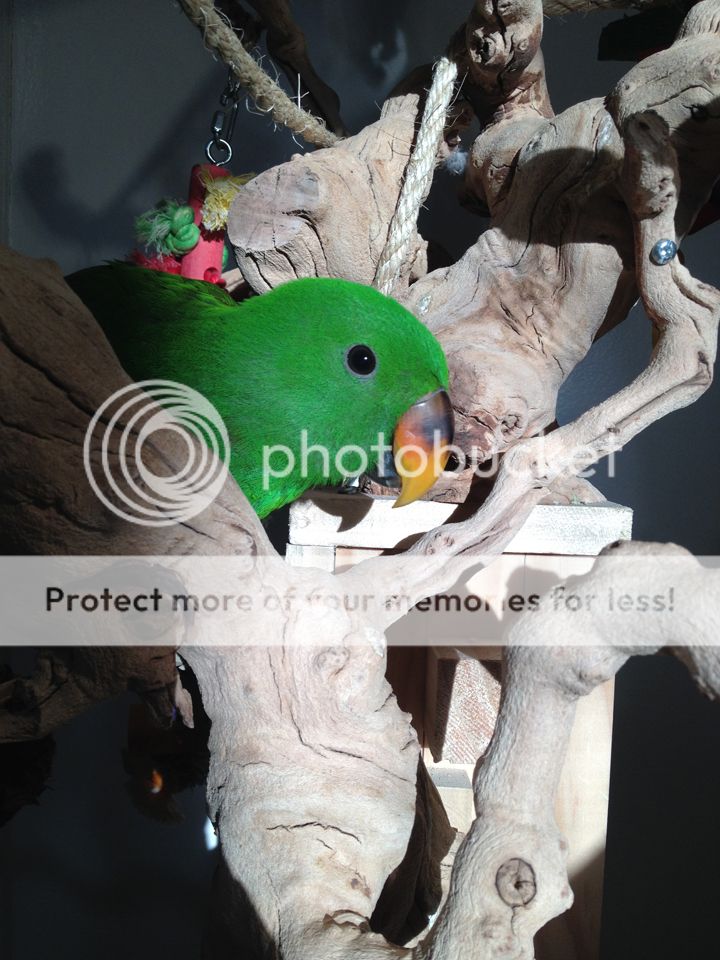
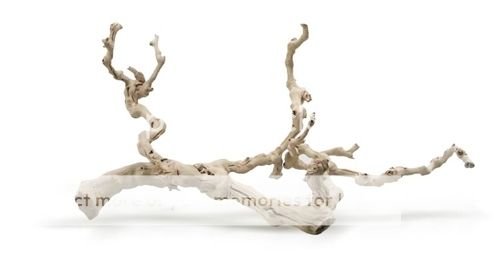
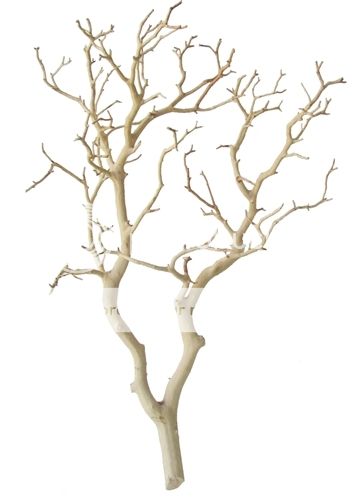
This is entirely up to you. If you have access to bird safe, chemical free branches then use those. Living in the city, I do not. I ordered Sandblasted Grape Wood and Sandblasted Manzanita branches from Manzanita Branches from Blooms and Branches 10" to 7 ft.
Prepping Branches
Using your shears and rotary tool, prep your branches by removing smaller twigs as you see fit. In my case the Manzanita branches had some very sharp points. I sanded those down to safe nubs. Make your branches as bird safe as possible. Use your best judgement and look at existing store bought branches. See what they did right and how you may improve on them. Arrange your branches to see how you want the tree to roughly look and set a side.
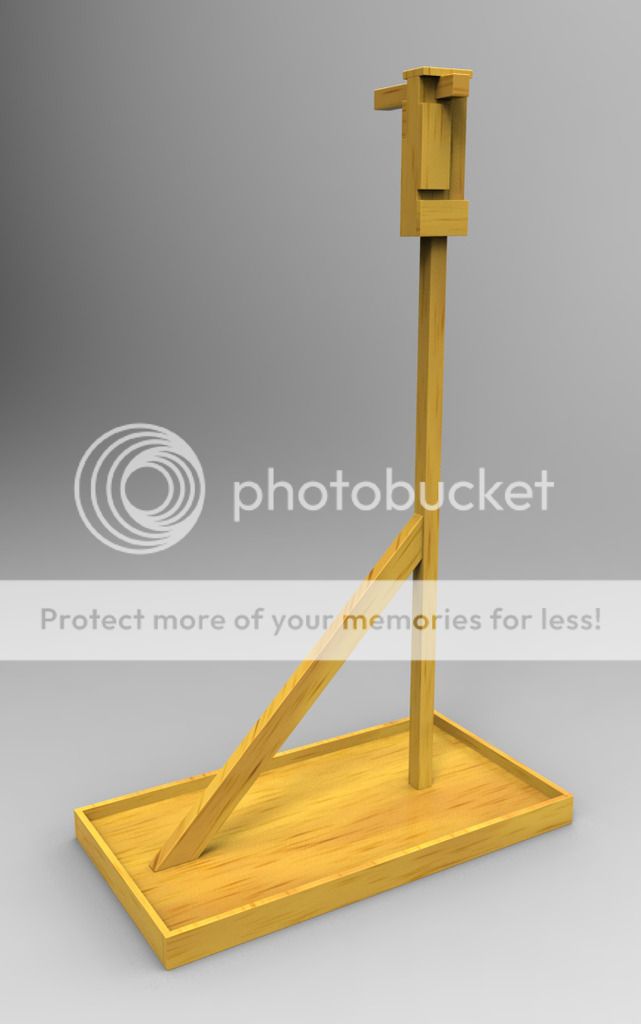
Getting the Base Going
Decide on the size you want the base to be. I went with 24 x 36 inches. I got 1/2 inch birch ply. Clear coat.
cut your 1X4 to frame the bottom with glue and stainless steel screws. First the front and back.

Then the sides.
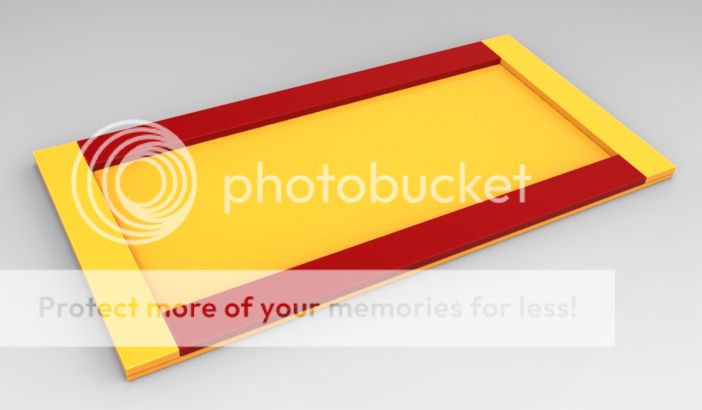
Cut your 1x4 to frame the edges with glue and stainless steel screws. First the front and back.

Then the sides.
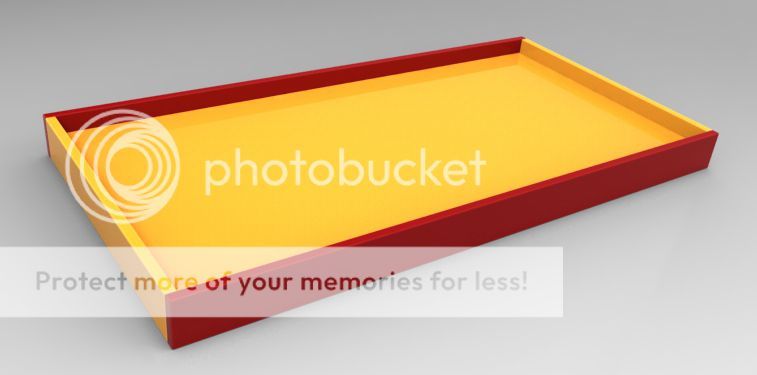
Add your casters now.
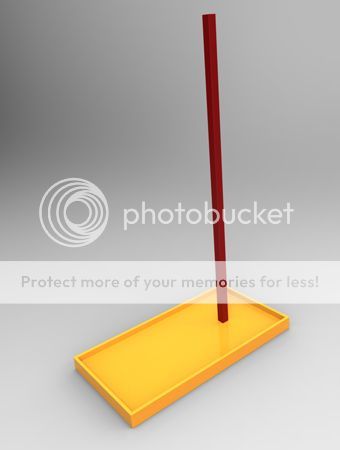
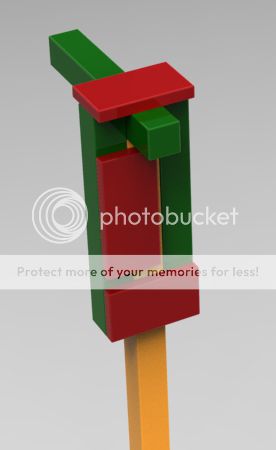
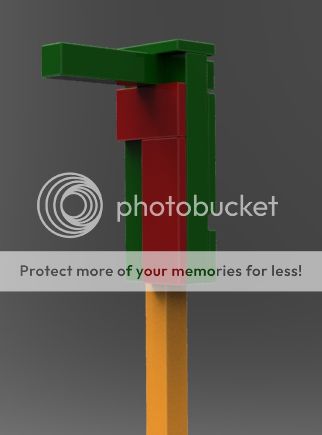
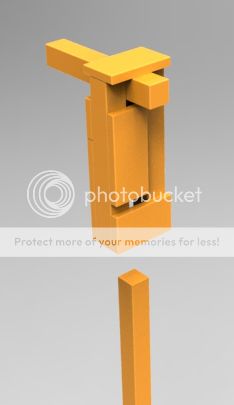
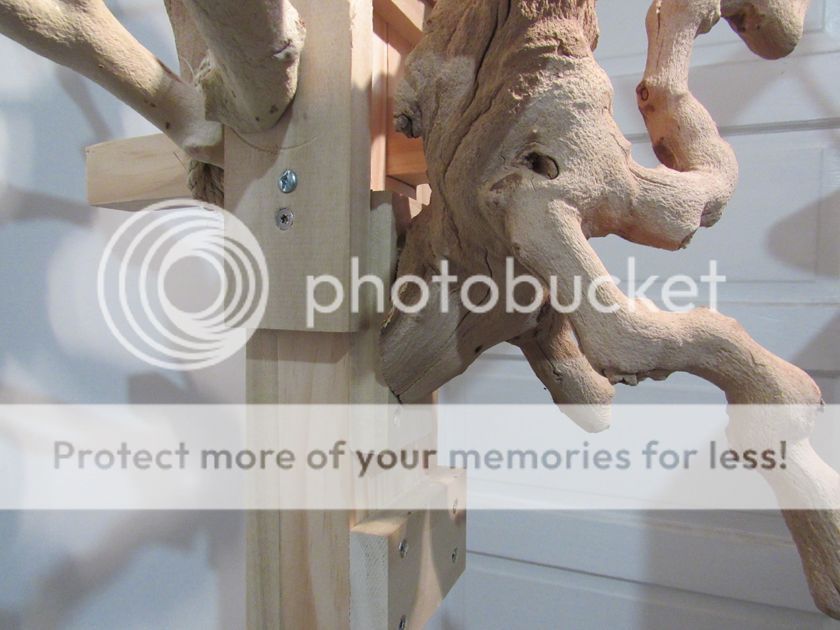
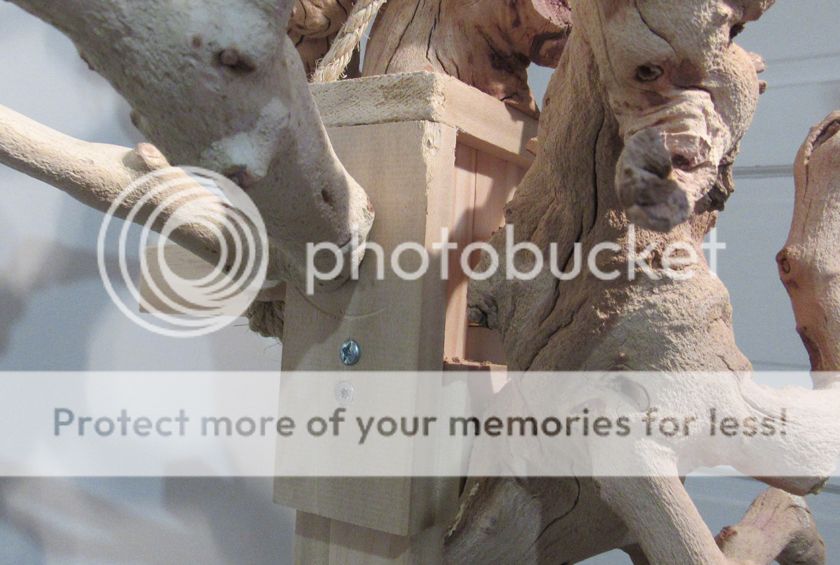
Tree Trunk and Stabilizer
Using the Hanger bolt, washer and nut, attach the trunk where you desire.
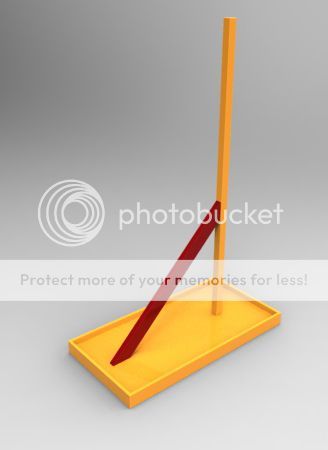
Using your Stabilizer measure and cut at 45 degree angles to stabilize the trunk.
Since I'm fairly new to the parrot world and don't always have advice coming from years of experience, I'm excited to contribute how I made Uglow's play tree.
First off you'll need some tools.
-Drill
-Hand Saw (preferably a reciprocating saw for ease)
-Miter Saw or Circular Saw
-Table Saw "optional" you can the store cut the size you need
-Rotary tool - with sanding and grinding attachment
-Gardening Shears
-Tape Measure
-Goggles and Dust Mask
Hardware
-1 inch Stainless Steel Wood Screws (NOT Zink or Galvanized)
-2 inch Stainless Steel Wood Screws
-3 - 3.5 inch Stainless Steel Wood Screws "large gauge"
-1 heavy duty Hanger Bolt with matching Washer and Nut.
Lumber (this all depends on the specs you set for yourself, heat treated pine with NO SAP pockets and Poplar are bird safe but please do your own research)
-Plywood (for base)
-1x4 or 1x3 (quantity and length depending on size of base)
-2x4 or 2x3 (stabilizer. depending on how heavy duty your tree is)
-2x2 or 4x4 (tree trunk. depending on how heavy duty your tree is)
Other Materials
-Sealer (I used waterbased polyacrylic- for speed and less fumes)
*you'll need a sealer in most cases because some plywood has
formaldehyde in it and will emit fumes.
-Casters (optional but helpful)
-Wood glue
-Rope (optional)
-Eye Screws Stainless Steel
Branches
This is entirely up to you. If you have access to bird safe, chemical free branches then use those. Living in the city, I do not. I ordered Sandblasted Grape Wood and Sandblasted Manzanita branches from Manzanita Branches from Blooms and Branches 10" to 7 ft.
Prepping Branches
Using your shears and rotary tool, prep your branches by removing smaller twigs as you see fit. In my case the Manzanita branches had some very sharp points. I sanded those down to safe nubs. Make your branches as bird safe as possible. Use your best judgement and look at existing store bought branches. See what they did right and how you may improve on them. Arrange your branches to see how you want the tree to roughly look and set a side.
Getting the Base Going
Decide on the size you want the base to be. I went with 24 x 36 inches. I got 1/2 inch birch ply. Clear coat.
cut your 1X4 to frame the bottom with glue and stainless steel screws. First the front and back.
Then the sides.
Cut your 1x4 to frame the edges with glue and stainless steel screws. First the front and back.
Then the sides.
Add your casters now.
Tree Trunk and Stabilizer
Using the Hanger bolt, washer and nut, attach the trunk where you desire.
Using your Stabilizer measure and cut at 45 degree angles to stabilize the trunk.
Last edited:
")